Barbed Wire Fence
I like cows but they are frustrating sometimes
Being in the cattle business makes life more enjoyable for me than it otherwise would be. IT’S rewarding to see the improvements in quality and consistency made in my herd over time that are a direct result of the breeding decisions I put in place. I also get a lot of satisfaction from working with livestock in general.
Having said all that though, I hasten to add that cows can be exasperating animals. The Corb Lund song “Cows Around”, was obviously written by somebody with some experience in the subject.
Take this morning for example. I’d just sat down at my computer to write about how it takes some effort to get a cow to stay where you put her. The typing hadn’t began yet when irony of ironies, my wife announced that there was a cow hiking up through a heavy stand of hay I’ve got growing behind my house. I grimaced imagining all the feed she was tromping under her feet. I jumped from my chair to peer out the back door at the offending critter. It was even more dismaying to see forty or so of her friends as they marched into view. They’d managed to knock down a gate. They had been in grass up to their bellies. They weren’t satisfied where they were at though. Cows seldom are.
The following article is on building a barbed wire fence that will keep your cows where you put them. There are always numerous ways to do the same thing. This is just an article on some of the things we do to make our cows stay where we want them to be.
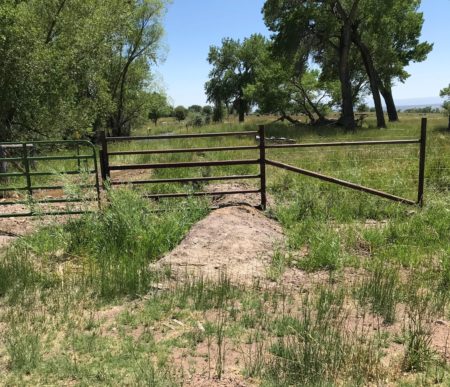
Good fences begin with good corner braces
To stretch barbed wire tightly you need to be tied off to brace posts that are solidly anchored in the ground. The longer the distance your pulling over, the more tension you’ll be putting on the brace posts. It’s not unheard of to see brace posts that are being pulled over by the tension on the wires that they’re tied off to.
Steel pipe H brace
If you’re in an area where oilfield pipe is available and you can weld, it makes excellent brace material. A simple H brace with the posts set 2 ½’ to 3’in the ground with cement will handle a lot of tension. For stretching wire over a longer distance, add an additional H to your brace setup.
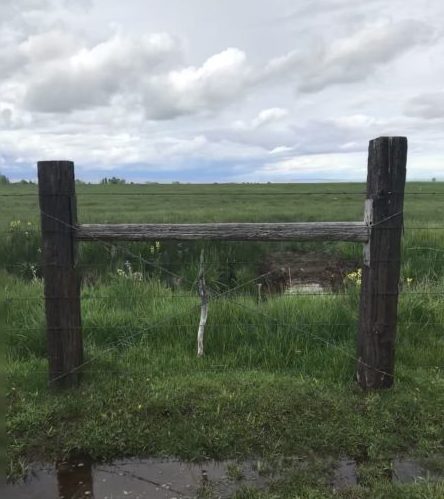
Wooden H brace with tensioning wires
If steel pipe isn’t readily available around your area, you can still construct a tough H brace with tensioning wires out of wood. Use rot resistant posts. In my area most people use either railroad ties or cedar posts solidly set a minimum of 3’ in the ground. The horizontal part of the H is a pine pole. Notch the posts so that the pole fits snugly in between them. Be sure to nail the pole in place with the crown up.
Adding tensioning wires is the next step in the construction process.
To do this drive a large nail half of its length in on the top and bottom of the outside of each post. Next, loop wire, 3 to 4 loops worth, from the top of the upper nail on one post to the bottom of the lower nail on the other. When your wire loops are in place, splice the ends together and bend the nails over the loops. Now repeat the same wire looping process with the remaining two nails. You now have a wire x across your H brace. These are your tensioning wires.
To tighten them use a 24 to 30’’ piece of rebar, two by four, or even a stout tree branch. Insert one end of the tightening handle you’ve selected in the center of the wire x and begin twisting the wire. The more twists, the tighter the tensioning wires will become. When the wires are sufficiently tight, prop the end of the tightening handle behind the horizontal pole. Bend a nail over it to hold it in place.
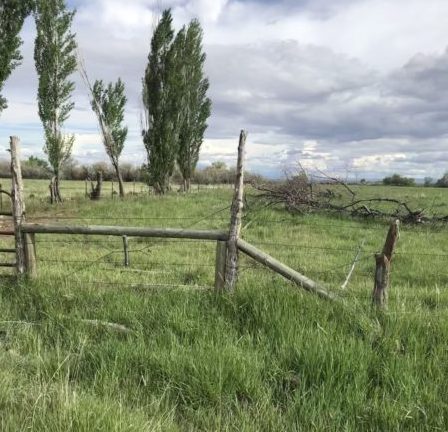
Diagonal brace
After doing all the above, if your stretching wire over any great distance, I recommend placing a a diagonal brace against the H brace. To accomplish this ad an additional post to the H brace set up and run a pole cut to fit diagonally from the center of the H brace post to the bottom of the next post. Add tensioning wires to this running in the opposite direction so the wires form an x with the diagonal brace. Tighten this set of wires with the same method mentioned above.
One more point on bracing is that over long distances some H braces along the line between your corners help keep the fence tighter. For instance, over a quarter mile stretch you’ll need at least one and probably two H braces in the line of your fence.
Stretching Barbed Wire
With brace posts set solidly in the ground you’re now ready to start stretching wire. Tie off your bottom wire 6” off the ground either from your far corner brace or the opposite end of the nearest H brace if you have H braces in your fence line. Now, unroll the wire back to your corner post and begin pulling it tight.
I use a come along chained to an immovable object along with a wire grip to stretch wire. “Your pickup makes a great immovable object by the way.” Wrap the wire around the corner post or the farthest brace post at your desired height so that it crosses over itself and then connect up your wire grip and come along. Pull the wire in a direction so that it crosses itself and makes an x. As the wire begins to tighten, walk back along its length and clear it from any obstructions.
When the wire is sufficiently tight, detach it from the gripper and wrap it back on its self without losing any of its tightness.
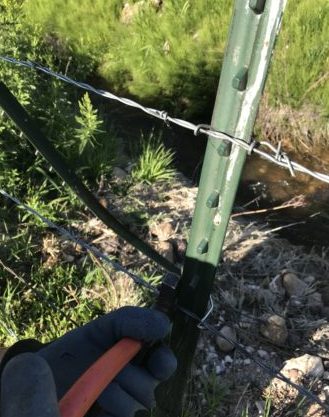
The way to accomplish this is different when using wood or steel braces. If the brace post is wooden, drive in a fence staple next to a barb to hold the wire in place and keep it tight then wrap the wire around the post an additional time and wrap it back into the tight wire. When your working with a steel brace post, pull the wire across itself. You’ll need an assistant to hold the wire firmly with fencing pliers where it intersects while you detach it from the wire grip and wrap it back into itself.
Barbed wire being stretched with a couple of different grips.
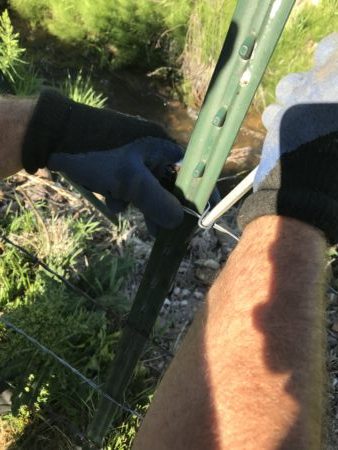
Time to drive the t posts.
When you have the bottom wire of your fence stretched, you’ll be ready to start driving in your posts. Use the tight wire as a guide to lay out a straight fence. Evenly space your posts, 8 to 12 ft. apart. Generally, t posts are set on the outside of the wire with the studs facing inward. The post is driven down until the triangle shaped anchor is buried. The length of the posts you use will depend on the number of wire strands you plan to put up. 5 strands are a bare minimum. When we replace old fence, we’re putting up 7 strands on a 6 ½’ post.
When all your posts are all set clip the wire to them and start rolling out the next one. Count out how many studs apart to clip the wires to make the top wire come out at the right height.
A screwdriver or a nail will do to twist on the side of the fence clip that requires twisting. Clinch the hook side with fencing pliers.
With a tight new fence around them, the cows should stay where you put them for a while.
They’ll immediately start rubbing on it and loosening it up though. It’s just what cows do other than eating grass and taking care of their calves. They don’t have much else on their daily itinerary. Consequently, they break a lot of things out of sheer boredom. Your fence will take some repair and maintenance from time to time. Below are some links on tightening, splicing and repairing barbed wire fences.
Most of the things I’ve outlined here are common knowledge.
You become good at building fence when your in the cow business. It just follows. People in different geographic areas have different traditions and different skill sets though. For example, I drove through an area in Montana where all corner posts were pillars of rocks encircled in net wire .
I hope I’ve passed along a nugget of value to you that you’ve never seen before. Even if I haven’t, hopefully you can still empathize with the topic.
Like the song says, “May you always have cows around”. I’ll add to that; may they always stay where you put them. Lloyd…